Please Note: This article is written for users of the following Microsoft Word versions: 2007, 2010, 2013, 2016, 2019, and 2021. If you are using an earlier version (Word 2003 or earlier), this tip may not work for you. For a version of this tip written specifically for earlier versions of Word, click here: Setting Your Default Document Directory.
Normally, Word starts looking for documents in the directory in which you started the program. If you want to change the default directory path, you can do so in the following manner:
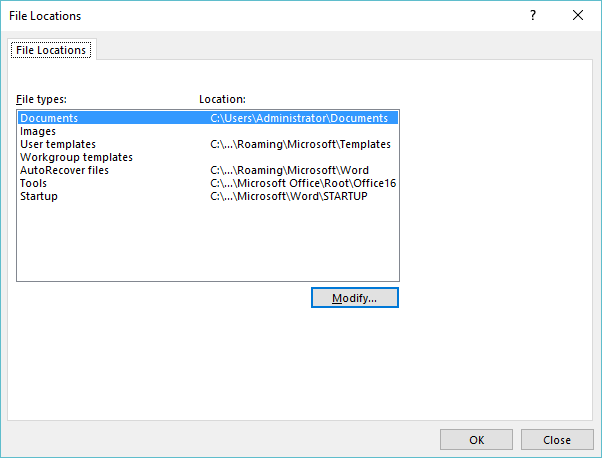
Figure 1. The File Locations dialog box.
Note that this setting affects only the beginning directory used by Word to look for documents, before you do any opening and saving of documents. There are other actions you can take in Word that will affect the default directory proposed by the program. For instance, if you open a Word document that is in a folder different than the default one you set in step 6, and then you use Save As to save the document under a different name, the proposed directory will not match the one set in step 6. Instead, Word proposes to save the file in the same directory that the original document was stored in.
WordTips is your source for cost-effective Microsoft Word training. (Microsoft Word is the most popular word processing software in the world.) This tip (9591) applies to Microsoft Word 2007, 2010, 2013, 2016, 2019, and 2021. You can find a version of this tip for the older menu interface of Word here: Setting Your Default Document Directory.

Do More in Less Time! An easy-to-understand guide to the more advanced features available in the Microsoft 365 version of Word. Enhance the quality of your documents and boost productivity in any field with this in-depth resource. Complete your Word-related tasks more efficiently as you unlock lesser-known tools and learn to quickly access the features you need. Check out Microsoft 365 Word For Professionals For Dummies today!
If you use a macro to create and work with text files, you can find out the length of those files using a simple command. ...
Discover MoreYour macros can easily add information to the end of an existing text file. This is done by opening the target file in ...
Discover MoreIf you take some care when you name your document files, you'll find it much easier to manage those files at a later ...
Discover MoreFREE SERVICE: Get tips like this every week in WordTips, a free productivity newsletter. Enter your address and click "Subscribe."
2021-10-11 13:33:40
Miles Motture
Hi, love your site!
How do you do this for Word 365 for Mac?
Got a version of Word that uses the ribbon interface (Word 2007 or later)? This site is for you! If you use an earlier version of Word, visit our WordTips site focusing on the menu interface.
Visit the WordTips channel on YouTube

FREE SERVICE: Get tips like this every week in WordTips, a free productivity newsletter. Enter your address and click "Subscribe."
Copyright © 2026 Sharon Parq Associates, Inc.
 Please Note:
This article is written for users of the following Microsoft Word versions: 2007, 2010, 2013, 2016, 2019, and 2021. If you are using an earlier version (Word 2003 or earlier), this tip may not work for you. For a version of this tip written specifically for earlier versions of Word, click here:
Please Note:
This article is written for users of the following Microsoft Word versions: 2007, 2010, 2013, 2016, 2019, and 2021. If you are using an earlier version (Word 2003 or earlier), this tip may not work for you. For a version of this tip written specifically for earlier versions of Word, click here:
Comments