Please Note: This article is written for users of the following Microsoft Word versions: 2007, 2010, 2013, 2016, 2019, 2021, and Word in Microsoft 365. If you are using an earlier version (Word 2003 or earlier), this tip may not work for you. For a version of this tip written specifically for earlier versions of Word, click here: Handling Long Lines in Address Labels.
Word allows you to easily create address labels from data stored in an external source, such as an Access database or an Excel workbook. Word essentially takes the information from those sources and "pours" it into the format you designate within Word. As the information is placed into the Word format, it is possible for one or more lines to be too long to fit within the allotted space in the label.
When an address line wraps to more than a single printed line, Word treats it like any other paragraph and left-aligns each line within the paragraph. What if you want the wrapped lines to not be left-aligned, but to have some other alignment? This is not as easy to do in Word but can be handled in a number of different ways.
The first way you can handle the wrapped lines is manually. Obviously, if you create a new document when you merge your labels, you can look through the addresses, find those lines that are too long, press Enter where you want the line to break, and adjust the alignment on the second (run-over) address line. This, of course, is rather tedious. This approach does have its advantages, however. The primary advantage is that the run-over address lines can be formatted in any manner desired, i.e., indented, centered, flush right, etc.
If you are looking for a more automatic approach, the only thing you can do is to adjust the formatting of the paragraphs used for the lines in a label. If you anticipate quite a few long address lines, this is definitely the way to go. The normal approach is to create your mail-merge document (for labels, of course), and then to adjust all the paragraphs in the labels so they use hanging indents. (This means that the first line will be left-justified, and additional lines will be indented to whatever degree you desire.) This approach doesn't give the benefit of being able to right-justify or center run-over lines, but the trade-off is that you don't need to manually adjust any lines. Follow these steps:
At this point you have a sheet of labels on your screen and you are ready to format them to handle long lines properly. Follow these steps:
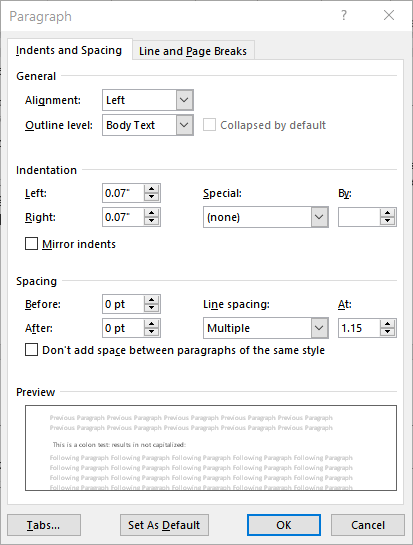
Figure 1. The Paragraph dialog box.
Your labels are now set, and you can do your mail merge as you normally would. The result is run-over lines that are indented from the left margin, which makes them stand out a bit.
WordTips is your source for cost-effective Microsoft Word training. (Microsoft Word is the most popular word processing software in the world.) This tip (9478) applies to Microsoft Word 2007, 2010, 2013, 2016, 2019, 2021, and Word in Microsoft 365. You can find a version of this tip for the older menu interface of Word here: Handling Long Lines in Address Labels.

Discover the Power of Microsoft Office This beginner-friendly guide reveals the expert tips and strategies you need to skyrocket your productivity and use Office 365 like a pro. Mastering software like Word, Excel, and PowerPoint is essential to be more efficient and advance your career. Simple lessons guide you through every step, providing the knowledge you need to get started. Check out Microsoft Office 365 For Beginners today!
Using Word to create and print labels is a snap. All you need to do is provide the text you want on the labels, pick a ...
Discover MoreIf you need to put information on a label that has both left- and right-aligned information on the same line, it can be ...
Discover MoreWant the text printed on your labels to be centered vertically? It's not that hard, and this tip shows the easiest method.
Discover MoreFREE SERVICE: Get tips like this every week in WordTips, a free productivity newsletter. Enter your address and click "Subscribe."
There are currently no comments for this tip. (Be the first to leave your comment—just use the simple form above!)
Got a version of Word that uses the ribbon interface (Word 2007 or later)? This site is for you! If you use an earlier version of Word, visit our WordTips site focusing on the menu interface.
Visit the WordTips channel on YouTube

FREE SERVICE: Get tips like this every week in WordTips, a free productivity newsletter. Enter your address and click "Subscribe."
Copyright © 2026 Sharon Parq Associates, Inc.
 Please Note:
This article is written for users of the following Microsoft Word versions: 2007, 2010, 2013, 2016, 2019, 2021, and Word in Microsoft 365. If you are using an earlier version (Word 2003 or earlier), this tip may not work for you. For a version of this tip written specifically for earlier versions of Word, click here:
Please Note:
This article is written for users of the following Microsoft Word versions: 2007, 2010, 2013, 2016, 2019, 2021, and Word in Microsoft 365. If you are using an earlier version (Word 2003 or earlier), this tip may not work for you. For a version of this tip written specifically for earlier versions of Word, click here:
Comments