Please Note: This article is written for users of the following Microsoft Word versions: 2007, 2010, 2013, 2016, 2019, and 2021. If you are using an earlier version (Word 2003 or earlier), this tip may not work for you. For a version of this tip written specifically for earlier versions of Word, click here: Applying Formatting to Words.
Written by Allen Wyatt (last updated July 29, 2025)
This tip applies to Word 2007, 2010, 2013, 2016, 2019, and 2021
The general way you accomplish tasks in Word is to select the text on which you want to perform an action and then perform the action. For instance, if you wanted to make a text selection bold, you would first select the text and then click on the Bold tool on the Home tab of the ribbon, or press Ctrl+B.
If you want to apply formatting to a single word in your document, you don't need to first select it. All you need to do is make sure the insertion point is located within the word. To test this out, follow these steps:
You can try this out with virtually any character formatting. It even works if you make changes in the Font dialog box (press Ctrl+D). Any changes you make in the dialog box are automatically applied to the entire word.
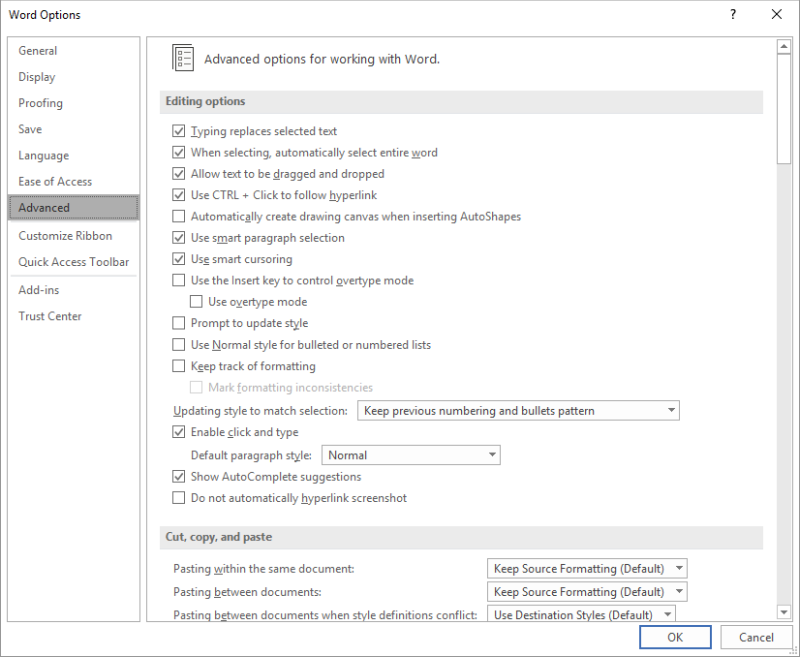
If this whole-word formatting doesn't work for you, it could be because of the way you have Word Options configured. Check this setting:

Figure 1. The Advanced options of the Word Options dialog box.
This setting controls not only how words are selected, but also how they are formatted when using the technique described in this tip. If the check box is selected, then the formatting works as described here; if the check box is not selected, then whole-word formatting won't work.
WordTips is your source for cost-effective Microsoft Word training. (Microsoft Word is the most popular word processing software in the world.) This tip (8794) applies to Microsoft Word 2007, 2010, 2013, 2016, 2019, and 2021. You can find a version of this tip for the older menu interface of Word here: Applying Formatting to Words.

Discover the Power of Microsoft Office This beginner-friendly guide reveals the expert tips and strategies you need to skyrocket your productivity and use Office 365 like a pro. Mastering software like Word, Excel, and PowerPoint is essential to be more efficient and advance your career. Simple lessons guide you through every step, providing the knowledge you need to get started. Check out Microsoft Office 365 For Beginners today!
Word provides a wide assortment of underlines that you can apply to your text. If the assortment isn't wide enough for ...
Discover MoreYou can format your text to use some very, very large font sizes. The results you see from formatting with large fonts ...
Discover MoreFormatting some of your text as hidden can be a great help when you need to keep some things from being viewed or ...
Discover MoreFREE SERVICE: Get tips like this every week in WordTips, a free productivity newsletter. Enter your address and click "Subscribe."
There are currently no comments for this tip. (Be the first to leave your comment—just use the simple form above!)
Got a version of Word that uses the ribbon interface (Word 2007 or later)? This site is for you! If you use an earlier version of Word, visit our WordTips site focusing on the menu interface.
Visit the WordTips channel on YouTube
FREE SERVICE: Get tips like this every week in WordTips, a free productivity newsletter. Enter your address and click "Subscribe."
Copyright © 2026 Sharon Parq Associates, Inc.
Comments