Please Note: This article is written for users of the following Microsoft Word versions: 2007, 2010, 2013, 2016, 2019, and 2021. If you are using an earlier version (Word 2003 or earlier), this tip may not work for you. For a version of this tip written specifically for earlier versions of Word, click here: Non-printing Page Borders.
Periodically I have people inquire as to why one or more of their full-page borders don't print out. The short answer is: You are using too big of a page border. If the border extends too close to the edge of the paper, your printer may not be able to print it. This is because all printers have what is called "dead space" around the edges of the paper. This space is typically used for mechanical handling of the paper, and therefore cannot be printed upon. Different printers have different amounts of dead space; you should check with your printer manufacturer for complete information.
To correct your page borders and make sure they are not in the dead space area, follow these steps if you are using Word 2013 or a later version:
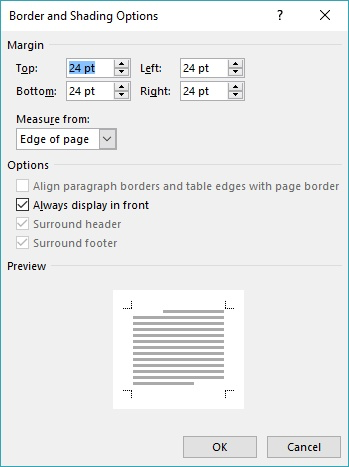
Figure 1. The Border and Shading Options dialog box.
If you are using earlier versions of Word, use the following steps:
When you reprint, if the border still won't print, then it could be an interaction between your page margin settings and your page border settings. You should make sure that the page border settings are larger than your dead space, but less than the applicable page margin. Thus, if your page border is set to print on the bottom at 36 points (one-half inch), then your page margin for the bottom of the page should be greater than one-half inch.
WordTips is your source for cost-effective Microsoft Word training. (Microsoft Word is the most popular word processing software in the world.) This tip (6025) applies to Microsoft Word 2007, 2010, 2013, 2016, 2019, and 2021. You can find a version of this tip for the older menu interface of Word here: Non-printing Page Borders.

Do More in Less Time! An easy-to-understand guide to the more advanced features available in the Microsoft 365 version of Word. Enhance the quality of your documents and boost productivity in any field with this in-depth resource. Complete your Word-related tasks more efficiently as you unlock lesser-known tools and learn to quickly access the features you need. Check out Microsoft 365 Word For Professionals For Dummies today!
When you place a border around a paragraph, the position of that border is determined, partially, by the indent with ...
Discover MoreAdd a border around a piece of text (such as a paragraph), and Word makes some assumptions about the placement of that ...
Discover MoreWord allows you to quickly add borders to cells in a table, but you may not know that you can also add borders to the ...
Discover MoreFREE SERVICE: Get tips like this every week in WordTips, a free productivity newsletter. Enter your address and click "Subscribe."
There are currently no comments for this tip. (Be the first to leave your comment—just use the simple form above!)
Got a version of Word that uses the ribbon interface (Word 2007 or later)? This site is for you! If you use an earlier version of Word, visit our WordTips site focusing on the menu interface.
Visit the WordTips channel on YouTube

FREE SERVICE: Get tips like this every week in WordTips, a free productivity newsletter. Enter your address and click "Subscribe."
Copyright © 2026 Sharon Parq Associates, Inc.
 Please Note:
This article is written for users of the following Microsoft Word versions: 2007, 2010, 2013, 2016, 2019, and 2021. If you are using an earlier version (Word 2003 or earlier), this tip may not work for you. For a version of this tip written specifically for earlier versions of Word, click here:
Please Note:
This article is written for users of the following Microsoft Word versions: 2007, 2010, 2013, 2016, 2019, and 2021. If you are using an earlier version (Word 2003 or earlier), this tip may not work for you. For a version of this tip written specifically for earlier versions of Word, click here:
Comments