Please Note: This article is written for users of the following Microsoft Word versions: 2007, 2010, 2013, 2016, 2019, 2021, and Word in Microsoft 365. If you are using an earlier version (Word 2003 or earlier), this tip may not work for you. For a version of this tip written specifically for earlier versions of Word, click here: Read-Only Documents.
Sometimes you'll want to circulate a file to other people, but you don't want them to change your words. There are several ways you can make your document read-only. The first, and simplest, way is to use the capabilities of your operating system to make the change. Simply create your document, and then (from outside of Word) change the properties of the document to indicate it is read-only.
The other way to accomplish this is from within Word itself, by following these steps:
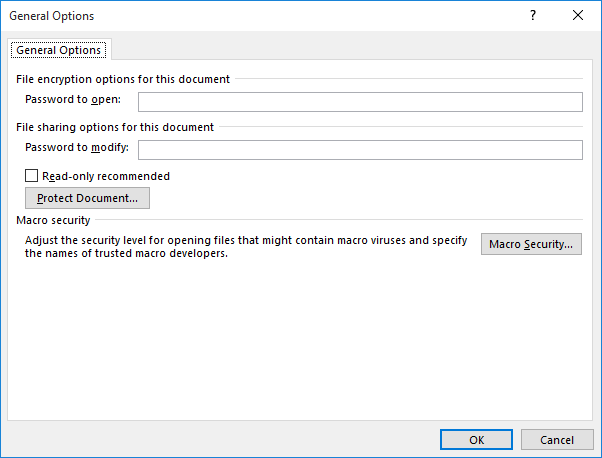
Figure 1. The General Options dialog box.
The only problem with this approach to protecting your document is that anyone can still load the file and then use the Save As option command to save their own copy of the document. The only sure way around this is to save the document in some other application format (such as a graphic image) that precludes any use of the information except for reading. If you use a program such as Adobe Acrobat (to create a PDF of your Word document), then you'll need to apply security permissions within that program to try to stop it from being saved back out in another Word document.
There is another option that may also fit the bill. This involves saving your document as a Word form, which can be easily protected. To accomplish this, follow these steps:
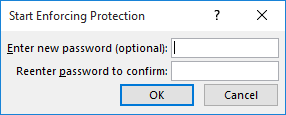
Figure 2. The Start Enforcing Protection dialog box.
Now nobody can change your document without knowing the password. It's important to note, though, that the encryption isn't the strongest. A search on Google can reveal several ways to try and crack this type of protection. Keep that in mind and choose the method which best suits your needs.
WordTips is your source for cost-effective Microsoft Word training. (Microsoft Word is the most popular word processing software in the world.) This tip (111) applies to Microsoft Word 2007, 2010, 2013, 2016, 2019, 2021, and Word in Microsoft 365. You can find a version of this tip for the older menu interface of Word here: Read-Only Documents.

Do More in Less Time! An easy-to-understand guide to the more advanced features available in the Microsoft 365 version of Word. Enhance the quality of your documents and boost productivity in any field with this in-depth resource. Complete your Word-related tasks more efficiently as you unlock lesser-known tools and learn to quickly access the features you need. Check out Microsoft 365 Word For Professionals For Dummies today!
If you want to break up a document and save it into different files, there are a few ways you can approach the task. This ...
Discover MoreWhen you save a document as a PDF file, Word allows you to specify how that PDF should be put together. This tip examines ...
Discover MoreYou may be surprised sometimes to save a document and find out that Word actually saves what appear to be two copies of ...
Discover MoreFREE SERVICE: Get tips like this every week in WordTips, a free productivity newsletter. Enter your address and click "Subscribe."
2023-07-10 11:58:57
Holly
I'm more concerned by the documents that RANDOMLY open "read only." I invariably discover the random "read only" setting upon trying to save the document that I've just edited and then I have to save under a different name. I've tried various solutions to clearing out the "read only" trigger to no avail. IT DRIVES ME NUTS. Thanks for all the help you've provided us trying to cope with this crap software. I've been using Word with all my might for eight years and I still miss WordPerfect.
Got a version of Word that uses the ribbon interface (Word 2007 or later)? This site is for you! If you use an earlier version of Word, visit our WordTips site focusing on the menu interface.
Visit the WordTips channel on YouTube

FREE SERVICE: Get tips like this every week in WordTips, a free productivity newsletter. Enter your address and click "Subscribe."
Copyright © 2026 Sharon Parq Associates, Inc.
 Please Note:
This article is written for users of the following Microsoft Word versions: 2007, 2010, 2013, 2016, 2019, 2021, and Word in Microsoft 365. If you are using an earlier version (Word 2003 or earlier), this tip may not work for you. For a version of this tip written specifically for earlier versions of Word, click here:
Please Note:
This article is written for users of the following Microsoft Word versions: 2007, 2010, 2013, 2016, 2019, 2021, and Word in Microsoft 365. If you are using an earlier version (Word 2003 or earlier), this tip may not work for you. For a version of this tip written specifically for earlier versions of Word, click here:
Comments