Marissa has a document that has 30+ section breaks within it. Most of these are continuous section breaks, but Marissa wants them all to be next-page breaks. She knows that she can delete the section breaks she wants to change and insert the desired type, but Marissa is wondering if there is a way to change the break type directly. That way she won't lose any section formatting, as she would when deleting a section break.
To make manual changes to the type of section break, follow these steps:
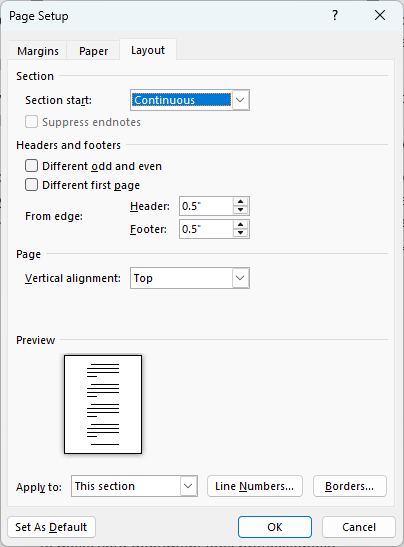
Figure 1. The Layout tab of the Page Layout dialog box.
There are a few things to note about these steps. First, you can only make this change using the Layout tab of the Page Layout dialog box. If you try to use the Breaks tool in the Page Setup group on the Layou tab of the ribbon, then Word inserts a new section break instead of changing the existing section break.
The next thing to note is that in step 4 you choose New Page. There is no option in the drop-down list to choose Next Page, which is the actual type of section break you want. This is a terminology inconsistency in Word's interface. Choosing "New Page" changes the section break to "Next Page."
After applying these steps, the section break type is changed, but no other section-based formatting is affected, just like Marissa wants. The only drawback is that applying the steps to every section in the document (Marissa has 30+ sections) can be rather tedious. If you have a lot of sections to affect, you could use Find and Replace to aid in the changing. Follow these steps:
The only difference in these steps and the first-presented steps is that you are using Find and Replace to select all of the sections in the document. This allows you to affect all of the section breaks at on time. This can also be the major drawback to this approach—all the section breaks are changed to Next Page. It wasn't clear from Marissa's problem description if she had other types of section breaks (such as Odd Page or Even Page) that she wanted to not change. If that is the case, then perhaps the best approach is to use a macro to do the type changes. The following should do the trick:
Sub ConvertSections()
    Dim sec As Section
    Dim sMsg As String
    Dim J As Long
    Dim K As Long

    If ActiveDocument.Sections.Count > 1 Then
        K = 0
        For J = 2 To ActiveDocument.Sections.Count
            Set sec = ActiveDocument.Sections(J)

            ' If the section starts with a Continuous break, change it
            If sec.PageSetup.SectionStart = wdSectionContinuous Then
                sec.PageSetup.SectionStart = wdSectionNewPage
                K = K + 1
            End If
        Next J
        sMsg = "Converted " & K & " continuous section breaks."
    Else
        sMsg = "There is only a single section in this document."
    End If

    MsgBox sMsg, vbInformation
End Sub
This macro first checks to ensure that there are at least two sections in your document. If there are, then it steps through the sections and changes all Continuous section breaks (wdSectionContinuous) to Next Page section breaks (wdSectionNewPage). Other types of section breaks are not affected.
WordTips is your source for cost-effective Microsoft Word training. (Microsoft Word is the most popular word processing software in the world.) This tip (13981) applies to Microsoft Word 2007, 2010, 2013, 2016, 2019, 2021, 2024, and Word in Microsoft 365.

Do More in Less Time! An easy-to-understand guide to the more advanced features available in the Microsoft 365 version of Word. Enhance the quality of your documents and boost productivity in any field with this in-depth resource. Complete your Word-related tasks more efficiently as you unlock lesser-known tools and learn to quickly access the features you need. Check out Microsoft 365 Word For Professionals For Dummies today!
Do you need to add page numbers that include, as well, a chapter number? It's relatively easy to do, as described in this ...
Discover MoreShare a document with someone else, and when they open it on their system, it may look different. This tip examines some ...
Discover MoreWant to add a page, with a different page number, in Word without affecting the entire document? The solution is a bit ...
Discover MoreFREE SERVICE: Get tips like this every week in WordTips, a free productivity newsletter. Enter your address and click "Subscribe."
There are currently no comments for this tip. (Be the first to leave your comment—just use the simple form above!)
Got a version of Word that uses the ribbon interface (Word 2007 or later)? This site is for you! If you use an earlier version of Word, visit our WordTips site focusing on the menu interface.
Visit the WordTips channel on YouTube

FREE SERVICE: Get tips like this every week in WordTips, a free productivity newsletter. Enter your address and click "Subscribe."
Copyright © 2026 Sharon Parq Associates, Inc.
Comments