Please Note: This article is written for users of the following Microsoft Word versions: 2007, 2010, 2013, 2016, 2019, 2021, and Word in Microsoft 365. If you are using an earlier version (Word 2003 or earlier), this tip may not work for you. For a version of this tip written specifically for earlier versions of Word, click here: Selecting Tabs in Dialog Boxes.
Written by Allen Wyatt (last updated February 17, 2024)
This tip applies to Word 2007, 2010, 2013, 2016, 2019, 2021, and Word in Microsoft 365
This definitely isn't a Word-only tip, but it can come in handy if you simply don't want to remove your hands from the keyboard. Many of the dialog boxes used in Word (and other Windows programs) utilize the concept of tabs. These days, tabs can look one of two ways in Word, depending on the dialog box you are using.
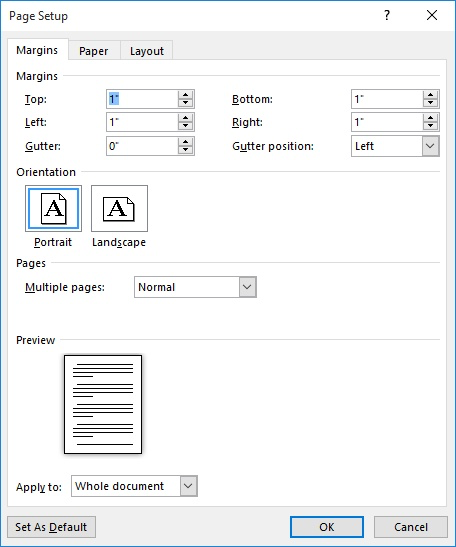
The traditional look for tabs is along the top of the dialog box. A good example of this look is visible in the Page Setup dialog box, which has three tabs (Margins, Paper, and Layout) in it. (See Figure 1.)

Figure 1. The Page Setup dialog box.
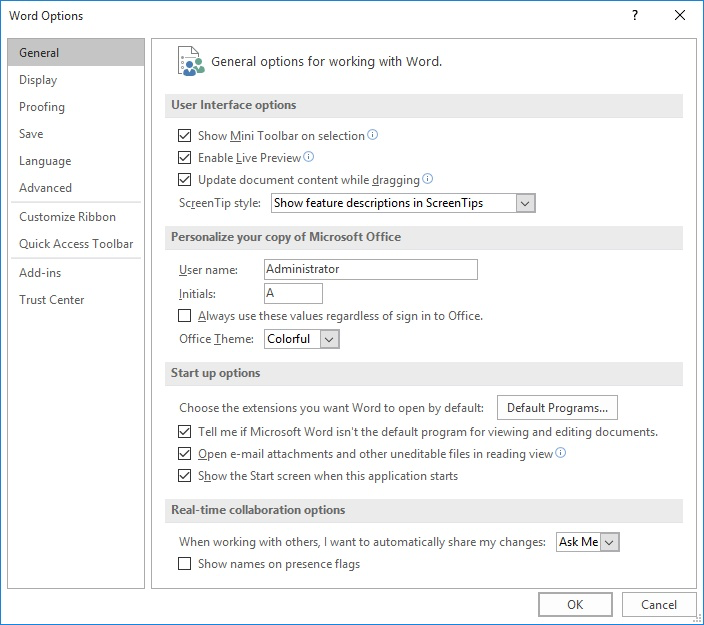
The other type of layout for tabs is along the left side of the dialog box. A good example of a dialog box that uses tabs at the side is the Word Options dialog box. (See Figure 2.)

Figure 2. The Word Options dialog box.
Regardless of whether the tabs are across the top or down the side, navigating through those tabs is essentially the same. The typical way is by using the mouse—simply click on the tab you want. If you prefer leaving your hands on the keyboard, Word provides helpful shortcuts. To move forward through the available tabs, simply press Ctrl+Tab. To move backwards, use Shift+Ctrl+Tab.
WordTips is your source for cost-effective Microsoft Word training. (Microsoft Word is the most popular word processing software in the world.) This tip (9721) applies to Microsoft Word 2007, 2010, 2013, 2016, 2019, 2021, and Word in Microsoft 365. You can find a version of this tip for the older menu interface of Word here: Selecting Tabs in Dialog Boxes.

Do More in Less Time! An easy-to-understand guide to the more advanced features available in the Microsoft 365 version of Word. Enhance the quality of your documents and boost productivity in any field with this in-depth resource. Complete your Word-related tasks more efficiently as you unlock lesser-known tools and learn to quickly access the features you need. Check out Microsoft 365 Word For Professionals For Dummies today!
Want to use the mouse to control the zoom level for your document? You can do it by combining your mouse use with the ...
Discover MoreYou can add a bit of sound to your editing tasks by turning on Word's sound capabilities. This tip shows where this ...
Discover MoreScreenTips can appear with or without shortcut keys displayed in them. Here's how to control whether they appear or not.
Discover MoreFREE SERVICE: Get tips like this every week in WordTips, a free productivity newsletter. Enter your address and click "Subscribe."
There are currently no comments for this tip. (Be the first to leave your comment—just use the simple form above!)
Got a version of Word that uses the ribbon interface (Word 2007 or later)? This site is for you! If you use an earlier version of Word, visit our WordTips site focusing on the menu interface.
Visit the WordTips channel on YouTube
FREE SERVICE: Get tips like this every week in WordTips, a free productivity newsletter. Enter your address and click "Subscribe."
Copyright © 2026 Sharon Parq Associates, Inc.
Comments