Written by Allen Wyatt (last updated February 11, 2023)
This tip applies to Word 2007, 2010, 2013, 2016, 2019, 2021, and Word in Microsoft 365
George notes that when he selects (clicks) on a row in a Word table it doesn't highlight in grey. He wonders why this doesn't happen and if there is a setting or option somewhere that governs this function.
There are two primary ways to select rows in a table, and those methods don't include clicking on the actual row. The method I use most often is to move the mouse pointer into the margin to the left of the table row I want to select. The pointer then turns into an arrow that points up and to the right. (See Figure 1.)
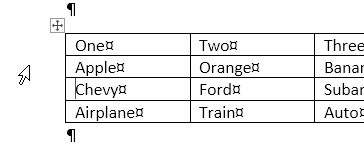
Figure 1. Getting ready to select a table row.
At this point, all I need to do is to click once and the entire row is selected and highlighted in gray. (See Figure 2.)
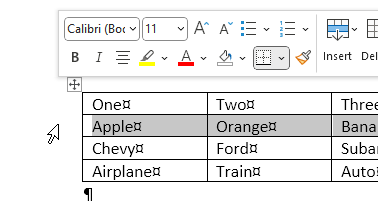
Figure 2. The table row is selected.
The second way to select a table row is to click anywhere within the row you want to select, then display the Layout tab of the ribbon. (That's the Layout tab that becomes visible when you click in the row.) Click the Select tool at the left side of the ribbon, and then choose Select Row. Word obediently selects the entire row.
Of course, there are some keyboard shortcuts you can use if you don't want to rely on the mouse. One way is to press the navigation keys until the insertion point is at the left side of the first cell in the row you want to select. Now hold down the Shift key as you press the Tab key. Notice that the first cell is now selected. Continue to hold down the Shift key and press the Tab key as many times as necessary to select the cells in the row. Then, press the Tab key (with Shift held down) one more time to select the end-of-row marker. This means, for example, that if your row has 5 columns (cells), you'll need to hold down the Shift key and press Tab 6 times to select the entire row.
A shorter method is to again position the insertion point at the beginning of the first cell in the row and then press Shift+Alt+End. All the cells in the row are selected, and you can select the end-of-row marker by holding down Shift and pressing Tab one time.
WordTips is your source for cost-effective Microsoft Word training. (Microsoft Word is the most popular word processing software in the world.) This tip (8217) applies to Microsoft Word 2007, 2010, 2013, 2016, 2019, 2021, and Word in Microsoft 365.

Learning Made Easy! Quickly teach yourself how to format, publish, and share your content using Word 2021 or Microsoft 365. With Step by Step, you set the pace, building and practicing the skills you need, just when you need them! Check out Microsoft Word Step by Step today!
Excel makes it very easy to add sequential numbers to a range of cells. Not so in Word's tables, where adding such ...
Discover MoreWord allows you to insert simple formulas, using fields, in table cells. If you want to see these formulas in their ...
Discover MoreMany times, before applying formatting or doing another operation, you need to select an individual cell in a table. ...
Discover MoreFREE SERVICE: Get tips like this every week in WordTips, a free productivity newsletter. Enter your address and click "Subscribe."
2023-09-15 22:31:53
Oscar
Hi there!
I have been working with Word since the DOS versions.
Strangely, only today I noticed that when selecting a cell, row, column, or the whole table, the selected greyed area is displaced to the right.
Although I am using Office 365 on my company's laptop, I observed the same behavior with Word 2013 and Word 2021.
I suppose that the offset is to avoid confusing the selection grey with a row banding.
I just wanted to share my finding.
Oscar
2023-02-11 22:59:23
Bob Beechey
To select some or all of current row:
1. Click in first cell of row you want to include.
2. Click and drag.
Got a version of Word that uses the ribbon interface (Word 2007 or later)? This site is for you! If you use an earlier version of Word, visit our WordTips site focusing on the menu interface.
Visit the WordTips channel on YouTube

FREE SERVICE: Get tips like this every week in WordTips, a free productivity newsletter. Enter your address and click "Subscribe."
Copyright © 2026 Sharon Parq Associates, Inc.
Comments