Please Note: This article is written for users of the following Microsoft Word versions: 2007, 2010, 2013, 2016, 2019, and 2021. If you are using an earlier version (Word 2003 or earlier), this tip may not work for you. For a version of this tip written specifically for earlier versions of Word, click here: Controlling Field Shading.
Normally, when you either select a field or move the insertion point into a field, Word highlights the entire field or result of the field. This is done so you can tell you are working in a field. Sometimes you may find this distracting, however. If you want to change the way that Word handles field shading, follow these steps:
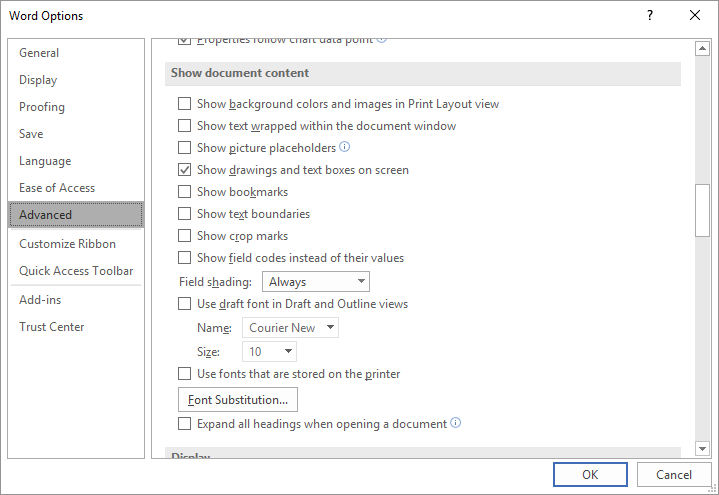
Figure 1. The Advanced options of the Word Options dialog box.
There are three options you can specify in step 3. The default is When Selected, which simply means that the field is shaded when it is selected, or you place the insertion point within the field. If you set the option to Never, then fields are never shaded, and (conversely) Always specifies that they are always shaded.
WordTips is your source for cost-effective Microsoft Word training. (Microsoft Word is the most popular word processing software in the world.) This tip (6107) applies to Microsoft Word 2007, 2010, 2013, 2016, 2019, and 2021. You can find a version of this tip for the older menu interface of Word here: Controlling Field Shading.

The First and Last Word on Word! Bestselling For Dummies author Dan Gookin puts his usual fun and friendly candor back to work to show you how to navigate Word 2019. Spend more time working and less time trying to figure it all out! Check out Word 2019 For Dummies today!
Templates are a powerful part of the Word experience, as they allow you to create and format documents based on patterns. ...
Discover MoreWord doesn't provide a field that allows you to return a word count for a portion of your document, but you can create ...
Discover MoreFields can be a great way of adding small snippets of dynamic data to your documents. However, you may want to get rid of ...
Discover MoreFREE SERVICE: Get tips like this every week in WordTips, a free productivity newsletter. Enter your address and click "Subscribe."
2020-01-24 15:34:15
Sarah
I'm working with a document that clearly has style formatting that is making the crossreference fields *print* with a grey background. I can't find the style that contains that formatting though. If I remove all formatting, the field behaves normally (highlighted when selected, not highlighted when not selected, and not *printing* with a grey background. Any idea how to track down the style with the background setting?
2020-01-10 10:48:48
Mike
Hello,
is there a way to make text form fields shaded before the user fills them in, but unshaded after the user fills them in? (For on-screen viewing, not printing.)
2019-09-13 13:58:18
When you activate restricted permissions through the review pane the grey shading of the text form fields is removed. How do you get them back? The method above does not work on these type of fields.
2019-08-29 04:54:23
Hip
this does not seem to work on Word for MAC! :-(
Got a version of Word that uses the ribbon interface (Word 2007 or later)? This site is for you! If you use an earlier version of Word, visit our WordTips site focusing on the menu interface.
Visit the WordTips channel on YouTube

FREE SERVICE: Get tips like this every week in WordTips, a free productivity newsletter. Enter your address and click "Subscribe."
Copyright © 2026 Sharon Parq Associates, Inc.
 Please Note:
This article is written for users of the following Microsoft Word versions: 2007, 2010, 2013, 2016, 2019, and 2021. If you are using an earlier version (Word 2003 or earlier), this tip may not work for you. For a version of this tip written specifically for earlier versions of Word, click here:
Please Note:
This article is written for users of the following Microsoft Word versions: 2007, 2010, 2013, 2016, 2019, and 2021. If you are using an earlier version (Word 2003 or earlier), this tip may not work for you. For a version of this tip written specifically for earlier versions of Word, click here:
Comments