Written by Allen Wyatt (last updated April 20, 2024)
This tip applies to Word 2007, 2010, 2013, 2016, 2019, Word in Microsoft 365, and 2021
When Wayne creates a new document, it has half-inch margins on all sides. Yet, when he begins to indent just once, he notices that the left margin moves over to where he indented. Then he begins the battle of having the margins stay where he wants them. Wayne wonders what is going on.
Before discussing what may be going on in Wayne's situation, it is a good idea to understand the difference between margins and indents. A margin, in Word, is the space left around the outside of a document. For instance, you may have half-inch margins set, and that defines the whitespace on all sides of the document. Margins can be changed on a section-by-section basis within a document.
Indents are applied to paragraphs and are cumulative with margins. For instance, if you have a half-inch margin and you indent a paragraph by a half-inch, there will be a full inch of whitespace to the left of the paragraph. If all the paragraphs on a page have the same half-inch indent, it is easy to think that the margin for the page has changed, but it has not—the margin is still set to a half-inch.
Because it is easy to confuse margins and indents, it is important to figure out what is happening with your own document. The easiest way to check your margin is using the Page Setup dialog box. To display the dialog box, display the Page Layout or Layout tab of the ribbon (depending on your version of Word) and click the small icon in the lower-right corner of the Page Setup group. (See Figure 1.)
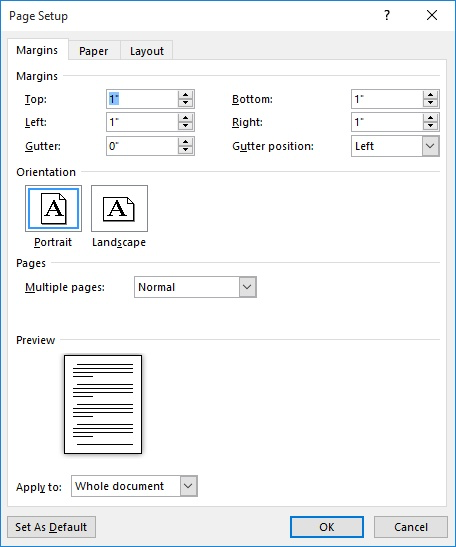
Figure 1. The Margins tab of the Page Setup dialog box.
Note the Margins area, near the top of the page. The settings here indicate the page margins for the current section of the document. In Wayne's case, where he is concerned about the left margin, he should make note of the Left setting in the dialog box. (Simply jot it down on a piece of paper.) When completed, you can click OK (if you made changes in the margins) or Cancel (if you made no changes).
To check the indent for a paragraph, simply place the insertion point within the paragraph you want to check. (You could select the entire paragraph, but there is really no need—just make sure that the insertion point is in the paragraph.) Then, display the Paragraph dialog box. You do this by displaying the Home tab of the ribbon and clicking the small icon at the bottom-right corner of the Paragraph group. (See Figure 2.)
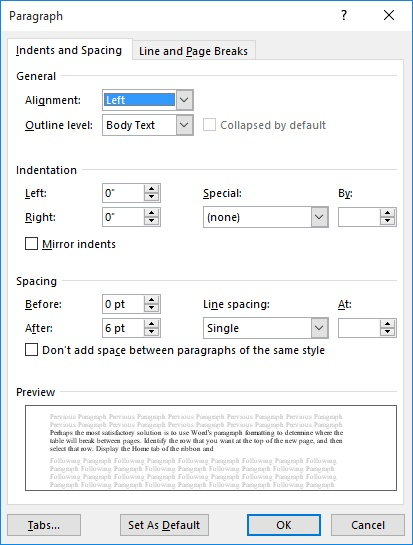
Figure 2. The Paragraph dialog box.
Note the Indentation area near the center of the dialog box. This is where the Left and Right indents can be set for the paragraph. In Wayne's case, he should note the Left setting. It is the Left setting in the Page Setup dialog box, added to the Left setting in the Paragraph dialog box, that specifies how much whitespace appears at the left of this particular paragraph.
If the paragraph indentation is not what you expect, then you can make changes to the Left setting and click on OK. (If you make no changes, just click on Cancel.) Note that any changes you make affect only the paragraph in which the insertion pointer is located.
If the Left setting was larger than desired, then it is very possible that Word is simply misunderstanding your use of the Tab key. For many people who come from a typing background (using typewriters), you press the Tab key to indent the first line of a paragraph. Word, on the other hand, may be interpreting this press of the Tab key as a desire to indent the entire paragraph. You can change this behavior by following these steps:
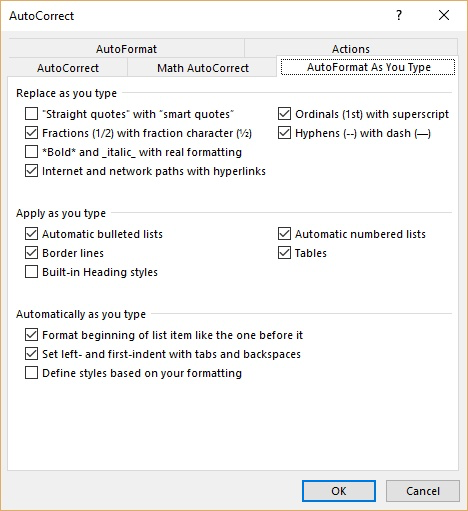
Figure 3. The AutoFormat As You Type tab of the AutoCorrect dialog box.
It is this setting (step 5) that controls how the Tab key behaves. Clearing the setting makes the Tab key function as you expect, meaning it doesn't move the indent for the entire paragraph. It also means that your "margins," so to speak, should not appear to jump around as you create your document.
WordTips is your source for cost-effective Microsoft Word training. (Microsoft Word is the most popular word processing software in the world.) This tip (4365) applies to Microsoft Word 2007, 2010, 2013, 2016, 2019, Word in Microsoft 365, and 2021.

Create Custom Apps with VBA! Discover how to extend the capabilities of Office 2013 (Word, Excel, PowerPoint, Outlook, and Access) with VBA programming, using it for writing macros, automating Office applications, and creating custom applications. Check out Mastering VBA for Office 2013 today!
There are times that you just want to begin a paragraph (perhaps a heading) at the top of a new page. Word allows you to ...
Discover MoreWord allows you to format a paragraph so that it is on the same page as whatever paragraph follows it. You may want, ...
Discover MoreYou can use the tools on the ribbon to adjust the indent applied to a paragraph. If you want to format a hanging indent, ...
Discover MoreFREE SERVICE: Get tips like this every week in WordTips, a free productivity newsletter. Enter your address and click "Subscribe."
2024-04-23 13:43:49
Kathy R.
You may also want to check that you're indenting your paragraph with an actual indent, and not just using the tab key. If you start your paragraph with a tab to indent it, the next paragraph will sometimes follow that indent. Of course, now that I've said that, I can't reproduce the behavior, but it's still something to check.
Kathy R.
Got a version of Word that uses the ribbon interface (Word 2007 or later)? This site is for you! If you use an earlier version of Word, visit our WordTips site focusing on the menu interface.
Visit the WordTips channel on YouTube

FREE SERVICE: Get tips like this every week in WordTips, a free productivity newsletter. Enter your address and click "Subscribe."
Copyright © 2024 Sharon Parq Associates, Inc.
Comments