Please Note: This article is written for users of the following Microsoft Word versions: 2007, 2010, 2013, 2016, 2019, and Word in Microsoft 365. If you are using an earlier version (Word 2003 or earlier), this tip may not work for you. For a version of this tip written specifically for earlier versions of Word, click here: Updating to Smart Quotes.
Written by Allen Wyatt (last updated November 21, 2020)
This tip applies to Word 2007, 2010, 2013, 2016, 2019, and Word in Microsoft 365
Smart quotes are those fancy quotes that point different directions—you know, you see them all the time in typeset material. Word uses smart quotes automatically as one of the features in AutoFormat. However, you may be working with files created in a text editor, a different word processor, or a previous version of Word that did not use smart quotes. In these instances, you may think you are forced to change the quotes and apostrophes (since they are also "smart") individually.
Not so! You can, if you desire, use the AutoFormat command; this will convert the quotes and apostrophes. However, this can mess up your other formatting. If you only want to affect the quotes and apostrophes, and nothing else, follow these general steps:
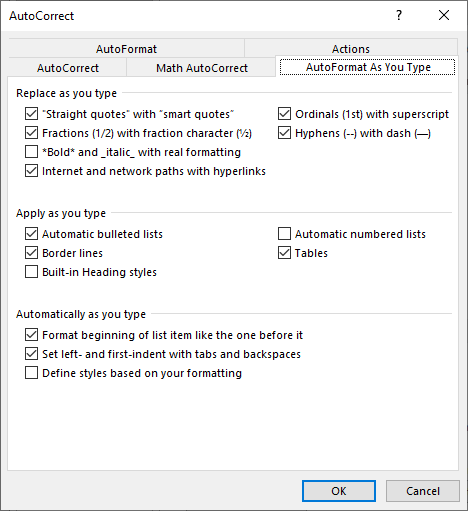
Figure 1. The AutoFormat As You Type tab of the AutoCorrect dialog box.
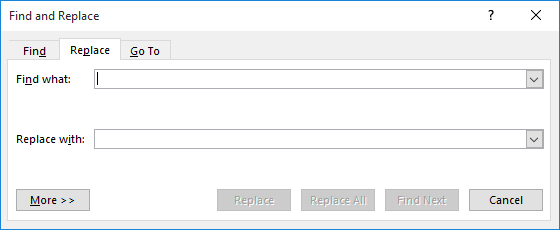
Figure 2. The Replace tab of the Find and Replace dialog box.
It is just as easy to get rid of smart quotes—for instance, if you need to send a document to a colleague who doesn't have a smart quotes capability. In this instance you can get rid of smart quotes and apostrophes by following the same steps. The only difference is that in step 5 you need to make sure that smart quotes is turned off.
WordTips is your source for cost-effective Microsoft Word training. (Microsoft Word is the most popular word processing software in the world.) This tip (9448) applies to Microsoft Word 2007, 2010, 2013, 2016, 2019, and Word in Microsoft 365. You can find a version of this tip for the older menu interface of Word here: Updating to Smart Quotes.

Comprehensive VBA Guide Visual Basic for Applications (VBA) is the language used for writing macros in all Office programs. This complete guide shows both professionals and novices how to master VBA in order to customize the entire Office suite for their needs. Check out Mastering VBA for Office 2010 today!
Have you had the margins in a group of documents change without you knowingly doing anything? This tip explores some ...
Discover MoreDo you have just a line or two of text that 'spills over' onto another printed page? Here are some ways you can compress ...
Discover MoreWhen you divide your document into sections in order to change page layout attributes, you need to give some thought to ...
Discover MoreFREE SERVICE: Get tips like this every week in WordTips, a free productivity newsletter. Enter your address and click "Subscribe."
2020-11-21 11:25:50
Galen Currah
We do half of our editing work with French language texts that employ « and » as first-level speech marks. Since our Office suite is Engliish, search and replace that includes speech marks convert these to curly, English " and ". Therefore we keep two tiny macros (micros?), one two toggle on curly quotes and another to switch them off.
Got a version of Word that uses the ribbon interface (Word 2007 or later)? This site is for you! If you use an earlier version of Word, visit our WordTips site focusing on the menu interface.
Visit the WordTips channel on YouTube

FREE SERVICE: Get tips like this every week in WordTips, a free productivity newsletter. Enter your address and click "Subscribe."
Copyright © 2024 Sharon Parq Associates, Inc.
 Please Note:
This article is written for users of the following Microsoft Word versions: 2007, 2010, 2013, 2016, 2019, and Word in Microsoft 365. If you are using an earlier version (Word 2003 or earlier), this tip may not work for you. For a version of this tip written specifically for earlier versions of Word, click here:
Please Note:
This article is written for users of the following Microsoft Word versions: 2007, 2010, 2013, 2016, 2019, and Word in Microsoft 365. If you are using an earlier version (Word 2003 or earlier), this tip may not work for you. For a version of this tip written specifically for earlier versions of Word, click here:
Comments