Written by Allen Wyatt (last updated September 11, 2021)
This tip applies to Word 2007, 2010, 2013, 2016, 2019, and Word in Microsoft 365
When creating and generating a table of authorities, Lindsay finds it difficult to add new codes to a document that already has codes in it. She wonders if there is a way—perhaps through a macro—that will strip out all the "TA" field codes in a document so she can start from scratch.
First, a quick note about the table of authorities feature in Word: Like other special tables, a TOA (Table of Authorities) is implemented through the use of fields. In specifying what should be included in the TOA, you go through your document and "mark" items you want included. (How you mark items is covered in other WordTips.) The marking process actually causes Word to add hidden fields to your document. It is these fields that indicate what should be included in the TOA when it is compiled by Word.
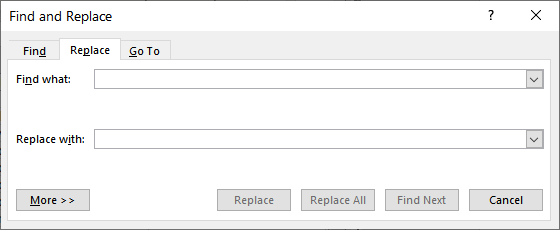
Getting rid of the hidden TOA fields is actually quite easy to do and (surprise!) doesn't require the use of a macro. In fact, you can use a regular Find and Replace operation to get rid of all the fields. The fields you want to search for are actually TA fields—that is the code within the fields. Simply follow these steps:

Figure 1. The Replace tab of the Find and Replace dialog box.
That's it! All of the TA fields in the document are removed, but other fields (if any) are left intact. You can hide your hidden text again, if wanted, and go through the process of again marking the TOA citations in the document.
WordTips is your source for cost-effective Microsoft Word training. (Microsoft Word is the most popular word processing software in the world.) This tip (13359) applies to Microsoft Word 2007, 2010, 2013, 2016, 2019, and Word in Microsoft 365.

The First and Last Word on Word! Bestselling For Dummies author Dan Gookin puts his usual fun and friendly candor back to work to show you how to navigate Word 2013. Spend more time working and less time trying to figure it all out! Check out Word 2013 For Dummies today!
A table of authorities is normally divided into separate sections based on categories you define. Here's how to create ...
Discover MoreIn legal documents a table of authorities is a common element. Creating the table is easy to do if you apply the ...
Discover MoreWith the entries for your table of authorities marked throughout your document, you are ready to actually generate the ...
Discover MoreFREE SERVICE: Get tips like this every week in WordTips, a free productivity newsletter. Enter your address and click "Subscribe."
There are currently no comments for this tip. (Be the first to leave your comment—just use the simple form above!)
Got a version of Word that uses the ribbon interface (Word 2007 or later)? This site is for you! If you use an earlier version of Word, visit our WordTips site focusing on the menu interface.
Visit the WordTips channel on YouTube
FREE SERVICE: Get tips like this every week in WordTips, a free productivity newsletter. Enter your address and click "Subscribe."
Copyright © 2024 Sharon Parq Associates, Inc.
Comments